Commands
background()
Syntax
background(r, g, b, a=1.0)
background(h, s, b, a=1.0)
background(c, m, y, k, a=1.0)
background(k, a=1.0)
background(color)
background(None) # transparent backdrop
background(*colors, angle, steps=[0,1]) # axial gradient
background(*colors, steps=[0,1], center=[0,0]) # radial gradient
Description
Sets the canvas background color using the same syntax as the fill(), stroke(), and color() commands. You can set the background to transparent by supplying None as its sole parameter (making it easier to import into Photoshop or Illustrator).
You can set the background to a gradient by passing more than one color value. For example background('#600', 'white') will draw a radial gradient ranging from dark red to white. Specifying an angle will render a linear gradient at that orientation. The optional steps parameter should be the same length as the number of colors in the gradient. Each entry defines the center of its corresponding color in the gradient in relative values ranging from 0–1.
Returns
a Color object containing the defined color values
Tutorial
Example

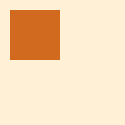
background(.2)
fill(1)
rect(10,10, 50,50)
clear()
Syntax
clear()       # erase the canvas
clear(all)    # erase the canvas and reset drawing state
clear(*grobs) # remove specific objects from the canvas
Description
Erases any prior drawing to the canvas and can optionally reset the graphics state (transform, colors, and compositing) when called with the all argument. Calling clear() with one or more references to previously-drawn objects will remove just those objects without otherwise affecting the drawing state.
Tutorial
Example
r = rect(0,0, 100,10) # add a rectangle
t = poly(50,50, 25)   # add a square
c = arc(125,125, 50)  # add a circle
clear(r, c) # remove the rectangle & circle
export()
Syntax
... # draw to the canvas
export("spool.pdf", cmyk=False)
... # draw at retina-quality to the canvas
export("spool.png", zoom=2)
with export("movie.mov", fps=30, bitrate=1.0):
    ... # draw movie frames
with export("anim.gif", fps=30, loop=0):
    ... # draw gif frames
The export() command allows you to generate images and animations from within your scripts. Calling export() as part of a with statement will allow you to render single images, multi-page sequences, or animations.
When running the PlotDevice application, you’ll likely find it more convenient to use the menu items ( and for images and animations respectively). But for standalone scripts that import the plotdevice module, the export() command is the main avenue for generating graphics.
Saving the canvas to an image
You can call export() at any time to write the current set of graphics objects on the canvas to a single bitmap or vector image file. The only required argument is a file path (whose extension will determine the format). The optional cmyk argument can be set to True to use ‘process’ colors when exporting to a PDF, EPS, or TIFF file.
By default, bitmap images will be exported at 1:1 resolution (i.e., one pixel for each ‘point’ in the area set via size()). The zoom parameter defaults to 1.0 and allows you to generate arbitrarily larger (or smaller) magnifications—though sticking to round numbmers like 1, 2, and 3 will give you the best results. As a shortcut, you can also set your filename to end with an "@…x" to specify the zoom factor.
For instance the following will generate identical bitmaps:
export("retina.png", zoom=2)
export("retina@2x.png")
Context Manager
The export() command returns a context manager that takes care of canvas-setup and file-generation for both single images and animations. By enclosing your drawing code in a with block, you can ensure that the correct sequence of clear() and export() calls is made automatically.
For instance these two methods of generating a PNG are functionally equivalent:
clear(all)
... # (do some drawing)
export('output.png')

# let the context manager handle clearing and saving the canvas automatically
with export('output.png'):
    ... # (do some drawing)
Animations
If you specify a filename ending in mov (or gif if you also pass a loop or fps argument), the export() command will begin a multi-frame animation and return an object to help you coordinate things. You can ‘capture’ this object and give it a name (for instance, movie) using Python’s ‘with … as …’ syntax.
Each time you call the movie’s add() method, a new frame with the contents of the canvas will be added to the end of the animation. Once you’ve added the movie’s final frame, you must call the finish() method to wait for the video encoder’s background thread to complete its work.
As with the single-image version of the export() call, you can use the with statement in your code to tidy up some of the frame-drawing boilerplate. All three examples below are equivalent. Note the use of the movie object’s frame property (which is itself a context manager) in the final example:
# export a 100-frame movie
movie = export('anim.mov', fps=50, bitrate=1.8)
for i in range(100):
    clear(all)  # erase the previous frame from the canvas
    ...         # (do some drawing)
    movie.add() # add the canvas to the movie
movie.finish()  # wait for i/o to complete
# export a movie (with the context manager finishing the file when done)
with export('anim.mov', fps=50, bitrate=1.8) as movie:
    for i in range(100):
        clear(all)  # erase the previous frame from the canvas
        ...         # (do some drawing)
        movie.add() # add the canvas to the movie
# export a movie (with the context manager finishing the file when done)
# let the movie.frame context manager call clear() and add() for us
with export('anim.mov', fps=50, bitrate=1.8) as movie:
    for i in range(100):
        with movie.frame:
            ... # draw the next frame
Image sequences
If you’re generating a series of static images, export() will automatically give them consecutive names derived from the filename you pass as an argument. If the filename is a simple "name.ext" string, the sequence number will be appended with 4 characters of padding ("name-0001.ext", "name-0002.ext", etc.).
If the filename contains a number between curly braces (e.g., "name-{4}.ext"), that substring will be replaced with the sequence number and zero padded to the specified number of digits:
# export a sequence of images to output-0001.png, output-0002.png, ...
#                                output-0099.png, output-0100.png
with export('output.png') as img:
    for i in range(100):
        with img.frame:
            ... # draw the next image in the sequence

# export a sequence of images to 01-img.png, 02-img.png, ...
#                                99-img.png, 100-img.png
with export('{2}-img.png') as img:
    for i in range(100):
        with img.frame:
            ... # draw the next image in the sequence
Multi-page PDFs
Creating PDF documents works the same way, letting you either clear(), add(), and finish() the export manually or take advantage of the with statement to hide the repetitive bits. Note that PDF exports use the page attribute rather than frame:
# export a five-page pdf document
pdf = export('multipage.pdf')
for i in range(5):
    clear(all) # erase the previous page's graphics from the canvas
    ...        # (do some drawing)
    pdf.add()  # add the canvas to the pdf as a new page
pdf.finish()   # write the pdf document to disk

# export a pdf document more succinctly
with export('multipage.pdf') as pdf:
    for i in range(5):
        with pdf.page:
            ... # draw the next page
geometry()
Syntax
geometry(units)
Description
Sets the units for angles supplied to drawing commands. By default this is DEGREES, but you can also use either RADIANS or PERCENT. The rotate() command will use whatever geometry-unit you select, as will the Point object’s methods and the angle argument used when creating Gradients.
Tutorial
Example
# turn the canvas 1/4 of the way around using radians
geometry(RADIANS)
rotate(pi/2)
# do the opposite using degrees
geometry(DEGREES)
rotate(-90)
plot()
Syntax
plot(grob)
Description
The plot() command will draw any PlotDevice primitive to the canvas. It’s useful in combination with the plot argument that can be passed to poly(), arc(), text(), image(), and friends.
When you call a drawing-related function with plot=, the object is created but not added to the canvas. You can save a reference to the object in a variable then pass it to plot() later to be drawn as-is or with additional styling in its keyword args.
False
Context Manager
The plot() command can also be used as part of a with statement to control whether drawing commands affect the canvas by default. For instance, you could suspend drawing inside an indented code block with:
with plot(False):
    p = poly(10,10, 30) # won't be drawn
This allows you to omit the plot=False argument in the individual commands, which can be convenient when creating a bunch of ‘template’ objects ahead of time.
Tutorial
Example

# create a shape (but don't draw it immediately)
r = rect(20,20,40,40, plot=False)
...
# draw the saved shape (but override the canvas's fill color)
plot(r, fill='red')

# the plot keyword arg prevents this from being drawn
o = oval(0,0,100,100, plot=False)

# the plot() command disables drawing for the entire block
with plot(False):
    o = oval(0,0,100,100)   # not drawn
    s = rect(100,100,10,10) # same here
size()
Syntax
size(width, height, unit=px)
Description
Sets the size of the canvas using your preferred measurement scale. If called with just width & height values, the canvas will default to using PostScript points for measurement (a.k.a. px).
If this command is used, it should generally be called at the very beginning of the script. An important exception to this is the use of the export() command as part of a with statement. In these cases it’s perfectly valid to set the size as the first line of the export-block.
If the optional unit arg is included, it should be one of: px, pica, inch, cm, or mm. Setting the canvas’s ‘default unit’ in this manner causes all subsequent drawing commands to be interpreted at that scale. The unit types can also be used to multiply values from other systems to the canvas’s units. For example 8.5*inch will always be the width of a letter page (regardless of the canvas’s unit).
The dynamic variables WIDTH and HEIGHT can be used to obtain the canvas size.
Tutorial
Example
size(20, 20, cm)
# the canvas is 20 x 20 cm
print(2*inch)
>>> 5.079992238900746
speed()
Syntax
speed(fps)
Description
Sets the frame-rate for previewing animations in the application. The fps argument specifies the maximum speed of the animation in frames per second. Note that this is only a maximum and complex animations will likely update less frequently. Calling speed() only makes sense if your script has been written as an animation.
In an animation, your drawing code does not live in the top-level of the script, but instead is factored into a trio of commands that you define yourself: setup(), draw(), and stop(). Your setup() command is called once at the beginning of a run, and stop() is called once the run is halted. The draw() command gets called repeatedly (with the canvas being cleared between calls).
The global variable called FRAME will be incremented before every draw() and can be used in your code to track the passage of ‘time’.
Tutorial
Example
speed(30)

def setup(): # initialize variables, etc.
    pass

def draw(): # draw the next frame in the animation
    pass

def stop(): # gather up accumulated data, print summary info, etc.
    pass
Legacy Commands
halt()
Syntax
halt()
Description
Immediately ends an animation run.
Animations will typically run until you halt them manually using the keyboard shortcut. The halt() command lets you ‘bail out’ of an animation from code. This can be quite useful during debugging, but we discourage using it in scripts that you share with others.
Tutorial
Example
def draw():
    if FRAME==100:
        halt()
outputmode()
Syntax
outputmode(mode)
Description
Changes the way colors are displayed. While the colormode() command specifies the input of colors, outpumode() specifies the output. By default, the output mode for colors is RGB, but you can also set it to CMYK so that exported PDF’s are ready for print. Output in RGB will look brighter on screen, but for valid PDF documents the colors need to be in CMYK.
Returns
the current output mode (RGB or CMYK)
PlotDevice Equivalent
Choosing the output color-mode now happens as part of the application’s dialog box. If you’re calling the export() command directly, you can include a cmyk=True argument to override the canvas’s default mode. Otherwise exports will default to RGB.
Tutorial
Example
outputmode(CMYK)
ximport()
Syntax
libname = ximport("libname")
Description
The ximport() command is of historical interest to NodeBox users and is no longer necessary in PlotDevice. It allowed for importing ‘Libraries’ that had been installed in the ~/Library/Application Support/PlotDevice directory.
When called with a string whose value matches the name of an installed Library, the Library will be loaded and returned as a module. In addition, a reference to the current ‘graphics context’ is handed to the module, allowing it to change the graphics state, draw to the canvas, etc.
You can assign the module to a variable of any name you choose. Most of the time it makes sense to use the same name as the Library, but you’re free to pick something shorter if it’s too much of a mouthful.
Returns
PlotDevice Equivalent
The PlotDevice Libraries have been updated to work with the standard Python import statement.
Tutorial
Example
colors = ximport("colors")
background(colors.papayawhip())
fill(colors.chocolate())
rect(10, 10, 50, 50)