The PlotDevice application is a convenient environment for writing scripts and being able to quickly see how your edits affect the graphical output. But once you’re happy with the state of a script, you can start to treat it as a program in its own right (rather than a mere ‘document’ that only exists inside the app).
The graphics core used by the application is also available in a ‘console’ setting, allowing you to run your scripts from the command line. It can even be used as a traditional Python module that you import into your own programs.
The plotdevice Command
The scripts you write in PlotDevice can be run from the terminal using an external command line tool called plotdevice. The command allows you to run scripts, coordinate with an external editor, and export images, movies, or animated GIFs.
Installing the tool
In the application, open the Preferences window and click the Install button:
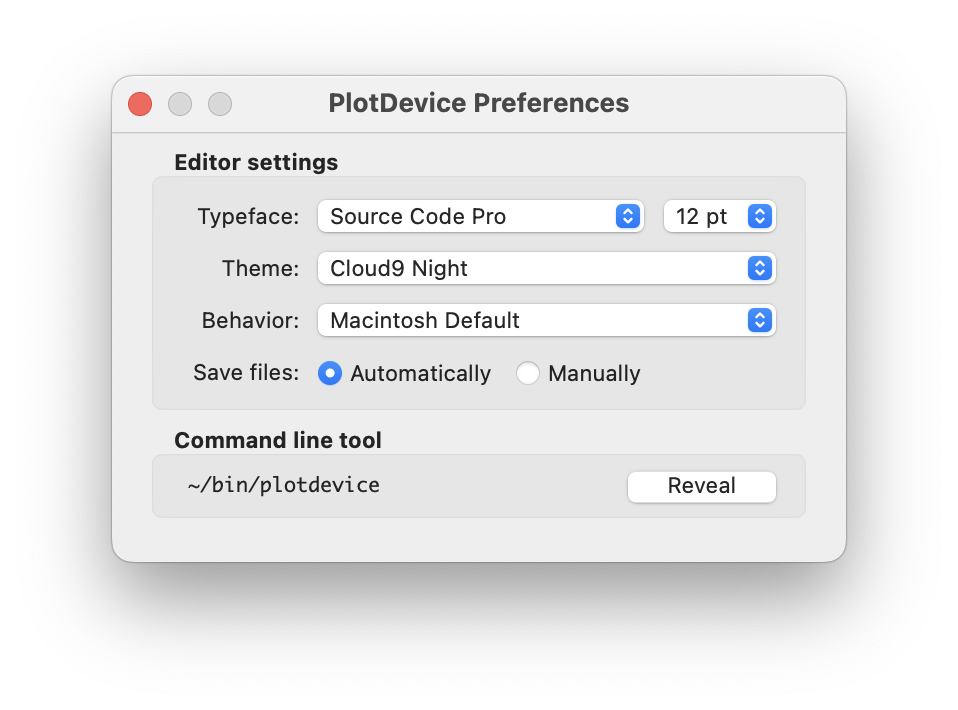
Select a destination folder in your shell’s PATH and the application will create a symlink from there to the script contained in the app bundle. If admin privileges are required to access the selected folder, you will be prompted for your password.
Note that since this connection involves a symlink, the plotdevice command will
break if you move the application after installing the tool. If this happens, you will see an
error message in the Preferences window and can reinstall the link using the same procedure as
before.
Running Scripts from the Command Line
Once you have installed the plotdevice tool you can run any of the ’.pv’ scripts you’ve written with the app. Running one of the example scripts is as simple as opening a Terminal window and typing:
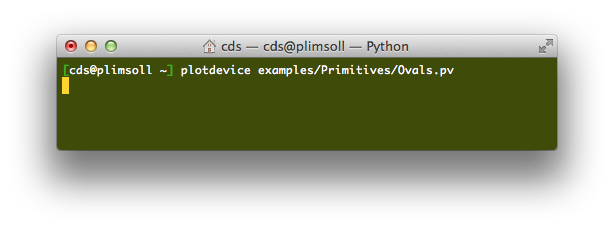
You’ll see a new document icon appear in the Dock and the script’s output will be displayed in a window:
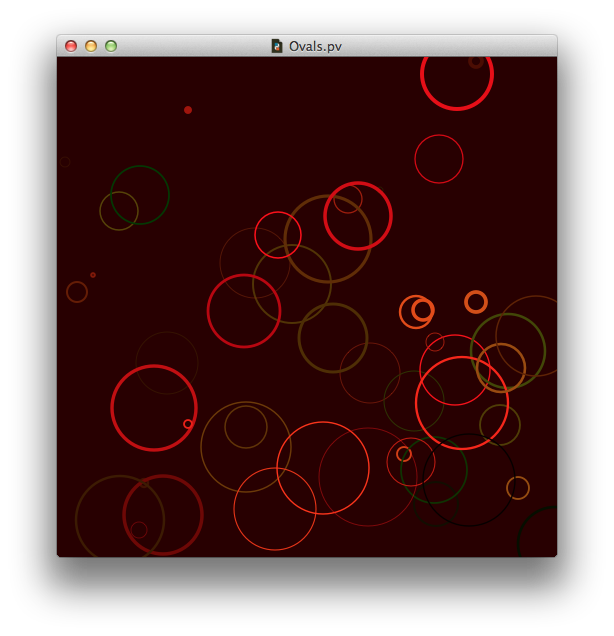
As in the PlotDevice application, you can use and to re-run and interrupt the script. The menu items are also available to you.
Command Syntax
Running the command with just a filename argument will display its output in a window, but with the right combination of command line switches you can export graphics to file using any of the supported image/video formats.
There are quite a few optional switches:
plotdevice [-h] [-f] [-b] [-q] [--virtualenv PATH] [--frames N or M-N]
           [--live] [--fps N] [--rate N] [--loop [N]] [--args [a [b ...]]]
           [--export FILE] [--zoom PERCENT] [--cmyk] [--version]
           [--install [package [package ...]]]
           script
But fear not; we’ll walk through each of the options below.
Runtime settings
-f
run full-screen
-q
run a PlotDevice script ‘quietly’ (i.e., without opening a window)
--virtualenv PATH
path to a virtualenv whose libraries you want to use (this should point to the top-level virtualenv directory)
--args [a [b ...]]
arguments to be passed to the script as sys.argv
External editor integration
-b
run PlotDevice in the background (i.e., don’t switch apps when the script is run)
--live
re-render graphics each time the script file is saved
Image/animation export
--export FILE
a destination filename ending in pdf, eps, png, tiff, jpg, heic, gif, or mov
--cmyk
convert colors to c/m/y/k before generating images (otherwise colors will be r/g/b)
--zoom PERCENT
scale of the canvas before generating the output image (100 = regular size). The output size can also be set to a multiple of the canvas size by ending the output filename with @2x, @3x, etc.
Animation options
--frames N or M-N
number of frames to render or a range specifying the first and last frames (default 1–150)
--fps N
frames per second in exported video (default 30)
--rate N
video bitrate in megabits per second (default 1)
--loop [N]
number of times to loop an exported animated gif (omit N to loop forever)
General information
-h, --help
show usage instructions and exit
--version
print the version of PlotDevice
Installing third party modules
--install [package [package ...]]
Use pip to download libraries into the directory, making them import-able in the application and by scripts run from the command line
Usage examples
# Run a script
plotdevice script.pv
# Run fullscreen
plotdevice -f script.pv
# Save script's output to pdf
plotdevice script.pv --export output.pdf
# Generate 1:1 and retina-scaled png files
plotdevice script.pv --export normal.png
plotdevice script.pv --export retina.png --zoom 200
plotdevice script.pv --export also-retina@2x.png
# Create an animated gif that loops every 2 seconds
plotdevice script.pv --export output.gif --frames 60 --fps 30 --loop
# Create a sequence of numbered png files – one for each frame in the animation
plotdevice script.pv --export output.png --frames 10
# Create a 5 second long H.265 video at 2 megabits/sec
plotdevice script.pv --export output.mov --frames 150 --rate 2.0
# Install some useful modules
plotdevice --install urllib3 jinja2 numpy
Using PlotDevice as a Module
Though the plotdevice command provides a convenient way
to launch scripts with the PlotDevice interpreter, you may prefer to use the graphics context and
export functions from within your own module (and running whichever python binary
your system or virtualenv provides).
Installing the module
Detailed installation instructions can be found in the project’s README file. To
simplify the use of PlotDevice with other external libraries, we recommend installing the module
into a virtual environment alongside your script:
$ python3 -m venv env
$ source ./env/bin/activate
(env)$ pip3 install -U pip wheel
(env)$ pip3 install plotdevice
But you don’t need to stop there. The Python Package Index has thousands of other modules your script can use. Install them into the virtualenv and your script will know just where to find them:
(env)$ pip3 install requests envoy bs4 # some other useful packages
A nice side-effect of installing into a virtualenv is that it automatically creates a copy of the plotdevice command that’s specific to that particular folder. When you ‘source’ the activate file, your path is adjusted to let you run the plotdevice command without specifying its path:
$ source ./env/bin/activate
(env)$ plotdevice myscript.pv # uses the tool found at ./env/bin/plotdevice
Initializing a graphics context from your script
The plotdevice module contains all the global commands and constants you’re used to from the application. For instance, the following will draw a few boxes:
#!/usr/bin/env python
from plotdevice import *

for x, y in grid(10,10,12,12):
    rect(x,y, 10,10)
Though using ‘import *’ is generally frowned upon in the Python community, we feel like it’s pretty easily justified in this case since PlotDevice’s raison d’être is to make your drawing code short-and-sweet.
You can then generate output files using the export() command. It takes a file path as an argument and the format will be determined by the file extension (pdf, eps, png, jpg, gif, or tiff):
export('~/Pictures/output.pdf')
If you’re generating multiple images, be sure to reset the graphics state in between frames with:
clear(all)
But if you plan to do more than generate a one-off, you’ll likely find the with export() usage more convenient. The context-manager provides some handy methods for writing images, multi-page PDFs, and even animations.
’PlotDevice scripts’ vs ‘Python scripts’
As you can see from the toy example above, Python scripts that use the plotdeivce module look a little different from scripts that run in the PlotDevice application. In particular, the lines at the very beginning of the Python script aren’t necessary in the application since it provides all the graphics commands implicitly as part of the script’s runtime environment.
In addition, scripts that run in the app or with the plotdevice command expect special handling relating to animations. Just by defining a draw() method in your script, the viewer will repeatedly clear the canvas and call your method – even though the script itself doesn’t explicity call it.
It’s for this reason that the scripts you save from the application end with a .pv extension rather than a .py. The file extension is a small reminder that there are some missing pieces required to turn the file into full-fledged Python script.
Luckily, converting a .pv script to run without the plotdevice tool is as simple as changing its file extension to py and adding three lines to the top of the code:
#!/usr/bin/env python
# encoding: utf-8
from plotdevice import *
Importing the module won’t give you the default animation behavior (though you can easily create movies with the export() command), but it will add all the familiar PlotDevice commands to the script’s namespace. In addition, it will load all the necessary C-extensions and other system dependencies.
If you’d prefer to keep your namespace tidy, you can also import the module as-is. Just remember to prefix all your commands with the module name:
#!/usr/bin/env python
# encoding: utf-8
import plotdevice as pd
pd.size(256, 256)
pd.background('red')
pd.rect(64,64, 128,128, fill='white')
pd.export('white-box.png')